
This page describes how you can modify a Seagate FreeAgent DockStar to work as a normal server running GNU/Linux.
Because this device uses max. 8 Watts (including the hard disk), this is an ideal candidate for a 24/7 running server (if the services you want to run don't need much RAM or exceptional speed).
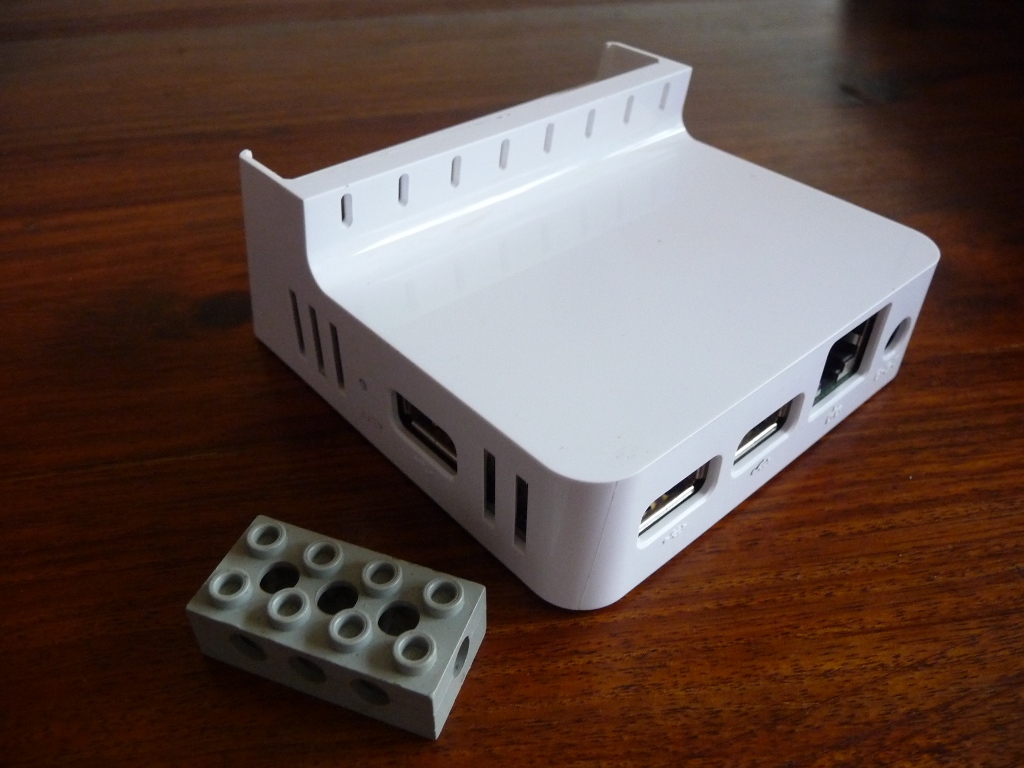
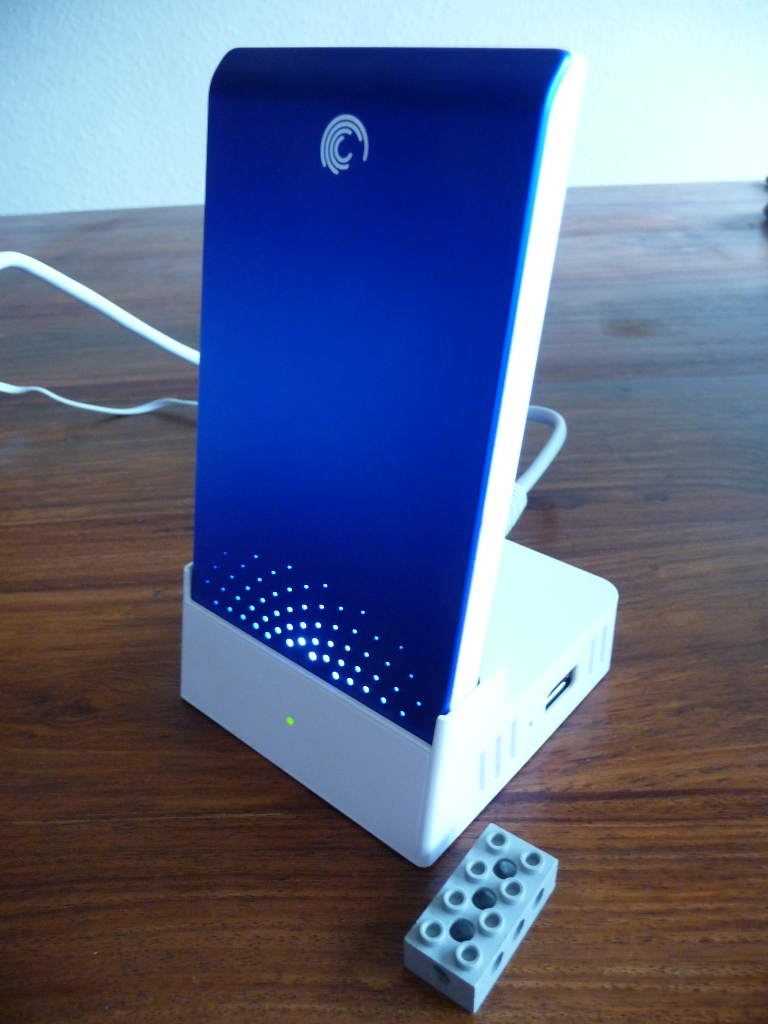
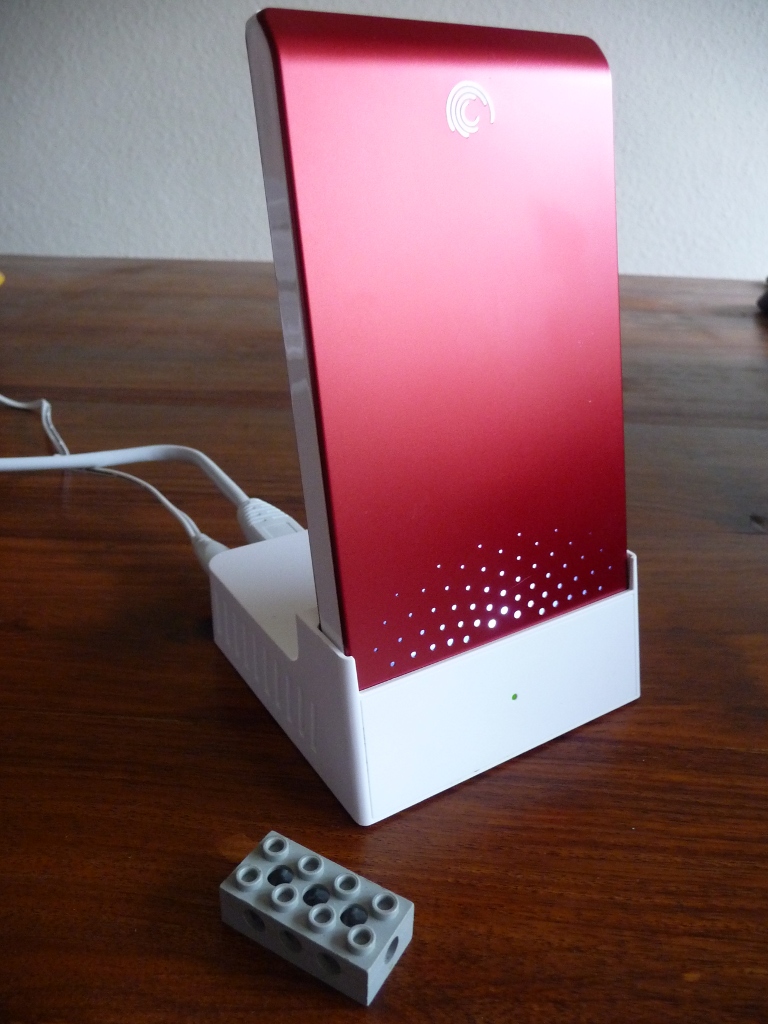
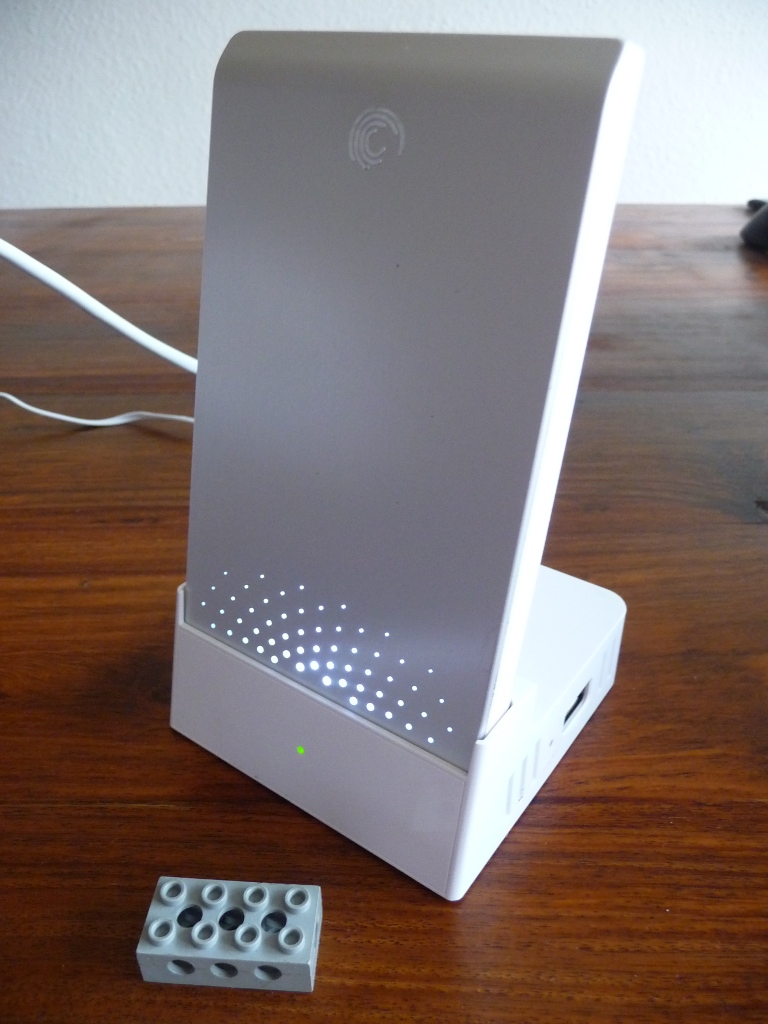
Some pictures:

I've just browsed a hour through the web looking for other sites about the DockStar and it seems my initial work (and the now nice price)
has borne fruit. ;)
You can now find many sites which are offering mostly easier and faster ways to brick your device than my description below.
If you want to learn something or if you prefer Gentoo, my description still might be the one to follow,
but if you just want to put a GNU/Linux system onto your device, most of the other descriptions are much better and faster.
They are more actual, often offer binaries, automatic scripts and other nice things which you won't find here. Here are some links:
But that doesn't mean, that I won't update this page in the future. The small collection of links above is here just because I have the hope
that it might help all those people who don't like my personal favorite so that my mailbox might receive less questions which are already answered elsewhere. But I have to thank all those people who are sending me e-mails about new stuff they have discovered. Thanks!
(And please, still forgive me if I don't answer to every e-mail, I'm no call center and usually want to get paid to give support, because my baker still refuses to give me bread for free. And we shouldn't forget the Vogons, you know, those people with the language nobody understands and who are believing that every men on this planet has to spend endless days and weeks in order to fulfill their neverending ideas.)
The hardware of the Seagate FreeAgent DockStar is mainly the same as the one which is used in those PlugComputers like the SheevaPlug. The difference to a SheevaPlug is that the DockStar has only 128 MB RAM (a SheevaPlug has 512 MB), doesn't have a functional real time clock, but includes a powered USB-hub with 4 ports from which one is used for the dock for one of those nice Seagate FreeAgent Go hard disks. And, of course, you normally don't have the possibility to run your own OS on that hardware, you have no access to a serial console and no possibility to connect a JTAG-dongle to change the firmware or recover from failures when changing the firmware. You can find a good review at SmallNetBuilder.
Just to be clear, so that no misunderstandings may arise: I have done the things I'm describing here in my spare time, I wasn't paid by anyone to do this and I don't have any financial interests in publishing these steps. See it as a gift and don't bother me with sentences like "You have to do this and that." or "You have to help me, ...". And, please, forgive me if I won't answer to an e-mail.
The primary motivation was the search for decent replacement for a VIA EPIA ML which was used 24/7 for things like VPN access, IMAP server, proxy, file server, MySQL and PostgreSQL server and many other things. While reading about the SheevaPlug I've come across a review about the DockStar (see above). Because I'm already using some of those nice FreeAgent Go hard disks for backup purposes, it doesn't took long until the decision was taken.
You might ask why not using a SheevaPlug? Well, my reasons were:
Warning: There are devices with a new firmware. You have to enable ssh using the software from Pogoplug, which means if you follow the instructions below, you will disable network access because the software from Pogoplug will be disabled, hence no ssh after that. I will update my instructions after I got a device with the new firmware. Until that, don't start changing anything without having at least access to the serial). You will need the serial to access the device if you disabled the Pogoplug software.
These instructions are for a device which has never got online. I never started this thing using the suplied firmware from Pogoplug while it was able to go online. The reason I mentioning this, is because I don't know if they are updating the firmware without asking the user. I don't know what may have changed if the firmware was updated (or used). Because I never was interested in using the software from Pogoplug, I never have activated the account needed to use this software (maybe I should ask for a reward *g*).
All the following steps are written for people experienced in using Linux systems. If you aren't experienced in using a GNU/Linux distribution (and vi), don't try to do it alone. Search someone experienced who will help you before starting to brick your DockStar. This guide will list all the necessary steps needed, but many of them will be without an explanation. You really should be familar with Linux and you should know what commands like "mount -o bind /dev /mnt/dev; chroot /mnt" are doing.
In case you will decide later that you want to use the original software, we are taking backups of the whole firmware (remember, backups are always a good idea).
We are using the same usb-storage device (hard disk or USB-stick) to store the backup where we later are installing the new system. Create at least three partitions on the USB-storage. The first must be formatted with vfat or ext2 and should have at least 10MB. This partition will only get the (new) kernel we are booting and the requirement for vfat or ext2 comes from the boot loader (Das U-Boot). The second partition will get the system, should have at least 4GB and must be formatted with ext2 or ext3 (not ext4, the original kernel we have to use for the next steps doesn't support ext4). The third partition will be used for swap (don't forget to change the type to 82 and format it using mkswap) and should have something around 1-3 GB (just in case someone will have the idea to compile things like open office *g*). If you are an old school fan of separate partitions for /var, /usr and such, feel free to create more partitions, this guide will only use the first three.
Get access through ssh or telnet. Both services are enabled so we have to find out which IP the device has, without attaching it to our normal network, so it can't go online.
Side note: If anyone from Pogoplug or Seagate reads this: You should warn your users that they never should use this device without having a firewall between it and the Internet. Escpecially because the DockStar is sold as a device which should be connected to the Internet for his main operation. And you should warn your users that this devices offers telnet and ssh access to everyone how knows the preset password. I don't have a problem with the fact that these services are enabled with a default password, but with regard to security it is absolutely not acceptable, that this is not mentioned at a prominent place in the documentation.
Attach the usb-storage and connect the DockStar with a network cable directly to a computer running Linux which doesn't route or offers DHCP. Plug in the power cable of the DockStar and wait until the LED is steadily orange. Because the device won't get an IP from an DHCP server, it will use an automatic generated IP between 169.254.1.0 and 169.254.254.255 (see RFC 3927).
To find out the IP the device uses we are scanning this range. You might have luck and this quick scan may find the IP:
If this won't find the device, you have to take the long route:
Someone sent me the hint, that the last two numbers in the IP are the last two bytes of the MAC. So this should be the fastest way (assuming BE and EF are the last two bytes of the MAC of your device):
Log in, and make a backup of the firmware, the Pogoplug software should already have mounted the partitions:
(Warning: At least the backup for mtd0 is useless because the kernel uses a different ECC algorithm than that old and modified version of U-Boot. Anyway, this guide here doesn't change the installed U-Boot, so that should be no problem.)
Wait a minute until the system has shut down (the LED will still be orange after shutdown), turn of the power of the DockStar, take the USB-storage device and make a backup of the directory Backup onto another device.
I'm using Gentoo as the distribution of my choice. However, except for this step, where we are installing the base system, the other steps should be more or less equal, regardless if you prefer Debian, Ubuntu or some other GNU/Linux distribution which offers support for the ARM architecture.
Plug in the power, wait until the LED is steadily orange and log in again. Because we need access to the Internet we are now disabling the startup of the Pogoplug software, so we are not risking that the device updates something when it can go online:
Comment out the line which starts the Pogoplug software using a dash save and quit vi:
(Warning: As already mentioned above, don't disable hbmgr on devices with a firmware where you have to enable ssh through the Pogoplug software. This will disable ssh after reboot/shutdown and you will loose access through ssh. Do this only, when you have access to the serial.)
Remount / again as read only and shutdown:
Again, wait a minute and turn off the device.
Now we are ready to connect the DockStar to our real network without the risk that it will phone home. Attach the USB-storage device, connect the DockStar to your router and log in again. The LED will now blink orange all the time because we have disabled the Pogoplug software. This time you could use the IP it will receive via DHCP from your router. If you don't know this IP, you can still use the IP found before:
You should see the new IP it has got from your DHCP server and the correct date and time (timezone UTC). If the date is wrong, it means the DockStar could not get the correct date via NTP and you should check out why it fails to connect to one of the NTP servers listed in /etc/ntp.conf.
If the date is correct, you can proceed installing the new system. For a further explanation of what this all does, please read the excellent Gentoo documentation. The stage3 tarball listed below might be outdated when you are reading this guide and you might have to use another one. Just be sure you are downloading a stage 3 for armv5.
Change /etc/make.conf so that it reads like this:
(Warning: With -std=gnu++0x some C++-source will not compile. I'm using this because the new standard offers some great new features e.g. in regard to "perfect forwarding". And if the STL uses them, I assume something more than 80 percent of all C++-programs will benefit from that. If you want to be sure everything compiles without changing make.conf, use the second line with CXXFLAGS and not the first.)
Edit /etc/conf.d/net and configure the network to use DHCP:
If you want to use a static IP /etc/conf.d/net must look like this:
Edit /etc/conf.d/hostname and set the hostname you want to use. Edit /etc/fstab, it should read like this:
Edit /etc/inittab, disable all terminals and enable the serial console:
Edit /etc/conf.d/local.stop to make the LED orange on shutdown:
Get the portage:
Now select the profile number which is named server and install some necessary tools (this will take about half an hour, go and drink a coffee or make your family happy):
Install newer linux-headers, we are going to install a recent kernel:
Enable necessary boot services, set the timezone and a password for root:
Edit /etc/conf.d/clock and set the timezone:
Having no functional realtime clock, we have to get the correct time very early in the boot process, otherwise booting will fail when fsck is called and the system will wait for the any key. I haven't found a clean way to do that, so we are changing /etc/init.d/udev which is called before checkroot is started:
Change the function populate_dev() and add the code block which sets the time (don't forget to change the IPs):
Depending on the time you are reading this, you should add a patch for procps. Without this, you often will see the message "Unknown HZ value!" with tools like ps or top.
As kernel we are using the latest stable one and applying some patches. Depending on the time you read this you should change the version used in the URL for git clone to get the latest version. You might want to use screen for some of those steps below, if you want to turn your box off while the DockStar fetches or compiles the kernel. Again, go and drink a coffee or make your family happy after you've started this:
I've made some patches for the kernel (LEDs, MTD and to force the usage of the in-kernel commandline), apply them along with a ready to use kernel config:
(If someone still wants the config and patches for Linux 2.6.33: config-2.6.33-dockstar linux-2.6.33_patches_dockstar.tar.bz2)
For not having to use the boot loader for changing the kernel command line, we are storing the command line in the kernel itself. If you want to use the netconsole you have to change the command line using "make menuconfig". This option can be found under "Boot options" and reads unmodified as:
With netconsole you should change it to something like this:
The documentation for the kernel parameter netconsole can be found in the file Documentation/networking/netconsole.txt.
No other modifications are currently necessary, if you want to add some drivers for other USB-devices like WLAN-sticks or such, I suggest to do this after you've booted the new system. Now it's time to compile the kernel we want to use. And again, go and drink a coffee or make your family happy after you've started this:
Copy the kernel to the first partition (sda1, already mounted in a step above to /boot). If you have formatted the first partition as vfat, you have to skip the line where a symlink in /boot is created. This symlink is not really needed and just makes sure, that if someone (we don't) uses (partition1)/boot/uImage as filename in the boot loader to load the kernel it will be found.
If you later want to upgrade to a new version, the sequence would be:
The (patched) version of Das U-Boot the DockStar comes with is just a pain. No support for netconsole, no support for USB, and, the worse thing of all, it's impossible to change the settings (environment) from within a started GNU/Linux system. At least I was unable (in reasonable time) to come up with something which would at least calculate the same checksum for the environment as the one which is stored in the NAND (of my DockStar). Normally something easy, but... The next problem would be to bring the ECC with which the environment in the NAND is protected by the boot loader in sync with the ECC the Linux kernel currently supports. But because I've already failed in calculating the checksum, I never looked in deep at that topic.
So in order to boot a system from USB, I see the following 4 approaches:
I will not describe (1) because it's too dangerous. (2) needs some research (and maybe a kernel patch because this only makes sense when we don't have to change the environment of U-Boot like arcNumber or mainlineLinux), and to describe (4) I have to do some research too. So (3) is left, which I'm describing here.
First get the actual sources for U-Boot:
My patches are for a version of U-Boot which was current in February 2010 and don't apply cleanly to later versions. I will change them if I will find the time to attach a JTAG adaptor for advanced playing. Reset the git tree to the version I used:
Apply some patches:
Edit /usr/src/u-boot/include/configs/sheevaplug.h and change the following entries to reflect your MAC (found on the sticker at the bottom of the DockStar) and the IPs. 192.168.ip.netconsole is the IP of the box you want to use for netconsole.
Currently there exists a small problem when enabling netconsole in U-Boot, the netconsole from the kernel won't work. If the netconsole in U-Boot is not enabled, the netconsole from the kernel will work. So choose your poison. My preference is to leave the netconsole enabled in both, so I can use at least the shell from U-Boot without having to attach a serial cable to the device. Maybe someone will come up with a patch for U-Boot or the kernel later.
If you don't want to use netconsole in U-Boot the entry for CONFIG_PREBOOT should just look like
To disable netconsole in the kernel the first line of CONFIG_EXTRA_ENV_SETTINGS should look like
In case you are wondering about the x_bootargs. Using my patches for the kernel they are not used and are just there if someone wants to use a vanilla kernel. This means to disable the netconsole in the kernel you have to change the commandline through menuconfig.
If you have formated the first partition which contains the kernel with fat, you have to change the line with ext2load in that file to fatload, so it reads like
Now commit your changes and build U-Boot:
Leave the chroot and write the new U-Boot to the unused space in the NAND. Double check the commands before executing them, if you are using the wrong mtd-partition, you will have a problem.
(pull the power connector a minute after that halt)
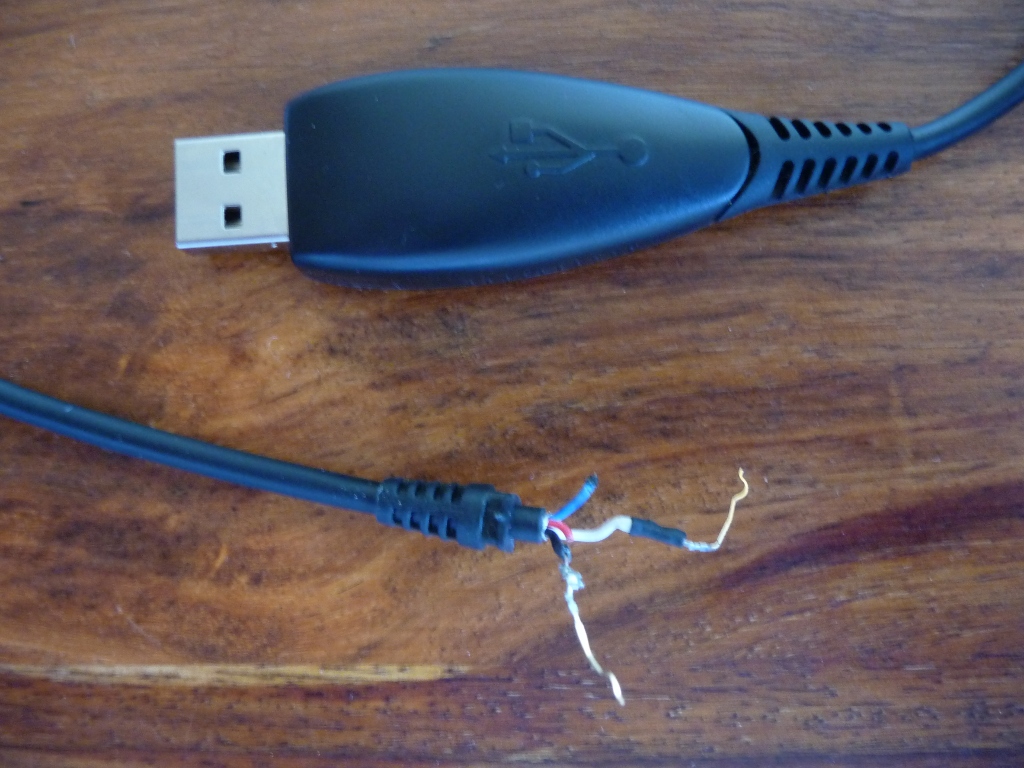
Open the device and attach the adapter for the serial console. I've used an USB-cable for a Siemens C55 phone which includes a Prolific PL-2303 USB to serial adaptor and is sold elsewhere. The colors below are the colors used in that cable. The 3 necessary pins where you have to attach the 3.3V RS232 can be found on the 10-pin header:
If you have opened the DockStar Pin 1 is the upper right one of
the 10-pin header when the ethernet jack looks away from you and
the 10-pin header is on the side near you. You have to use the three pins
on the lower right (6, 4 and 2).
(Someone told me that in his cable the blue and white wires are exchanged, just test it if doesn't work,
the hardware doesn't take any harm if those wires are exchanged.)
Again: this is not a normal RS232 because it uses 3.3V which means you either have to use such a cable
as I recommend or you have to use a level shifter (e.g. a MAX3232) to connect it to a normal RS232.
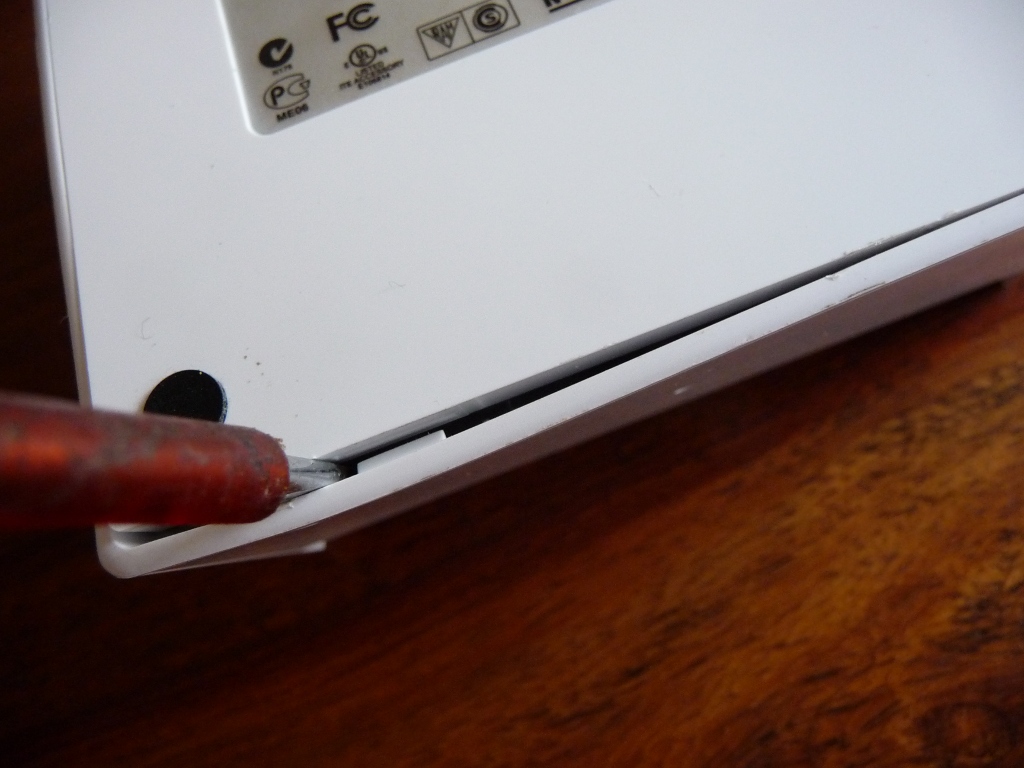
To open the device just use a screw driver, put it about 1cm deep into
the device and use some careful dosed force to remove the top. The plastic is really flexible, it won't break. Some pictures:

Start multicom, screen or something else to use the serial console (/dev/ttyUSB0, 115200 Baud, 8N1, no handshake), turn on the power and press a key when you see the message "Hit any key...":
Copy and paste the text printenv outputs to a textfile for your reference.
I suggest to save it in the directory where the backups are stored.
Change the settings of the original boot loader. Replace the "192.168.ip..."
with the IPs you want to use. Changing the IPs and the netmask isn't really necessary,
these are used only if you want to use tftp (not described here):
Time has come to start your new system. If you have enabled netconsole you might start netcat on the computer which IP you have entered as netconsole-target:
If you want to be able to interrupt the boot process for entering commands into the shell of your new boot loader, you could use the following:
Finally restart the device for booting into your new system:
Fine tune your system (read the Gentoo documentation). If you want to recompile all invoke emerge -ue world. A good idea might be to recompile at least glibc.
Enjoy.
All trademarks are the property of their respective owners.
This page was born on 2010-02-02 and has last grown up on 2012-11-15.
(c) 2010 Alexander Holler
Impressum / imprint